Tutorial
Preparation
FlexiMark is a VSCode extension. First, make sure you have VSCode installed.
If it's not installed, you can download it from the link below:
Next, install FlexiMark. Open the link below and click the “Install” button:
https://marketplace.visualstudio.com/items?itemName=Kashiwade.fleximark
To make writing Markdown easier, there are some useful extensions you might want to install alongside FlexiMark:
Checking Functionality
Open any Markdown file. If FlexiMark is properly installed, you’ll see an icon at the far right of the tab bar.
Clicking this icon will open the preview.
![]()
![]()
FlexiMark’s preview feature can be used even outside of a FlexiMark Workspace.
Creating a FlexiMark Workspace
Create a dedicated directory for FlexiMark and set it as a FlexiMark Workspace. From now on, Markdown notes will be created inside this directory/workspace.
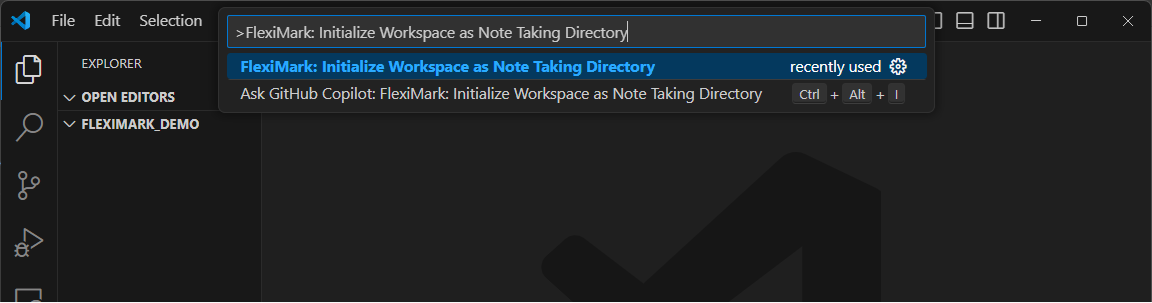
Create an empty directory and open it in VSCode. Then press F1 and enter the following command. Press Enter after typing.
FlexiMark: Initialize Workspace as Note Taking Directory
You’ll then see a screen like this. The editor will show a commented .vscode/settings.json file. These comments explain the various FlexiMark settings.
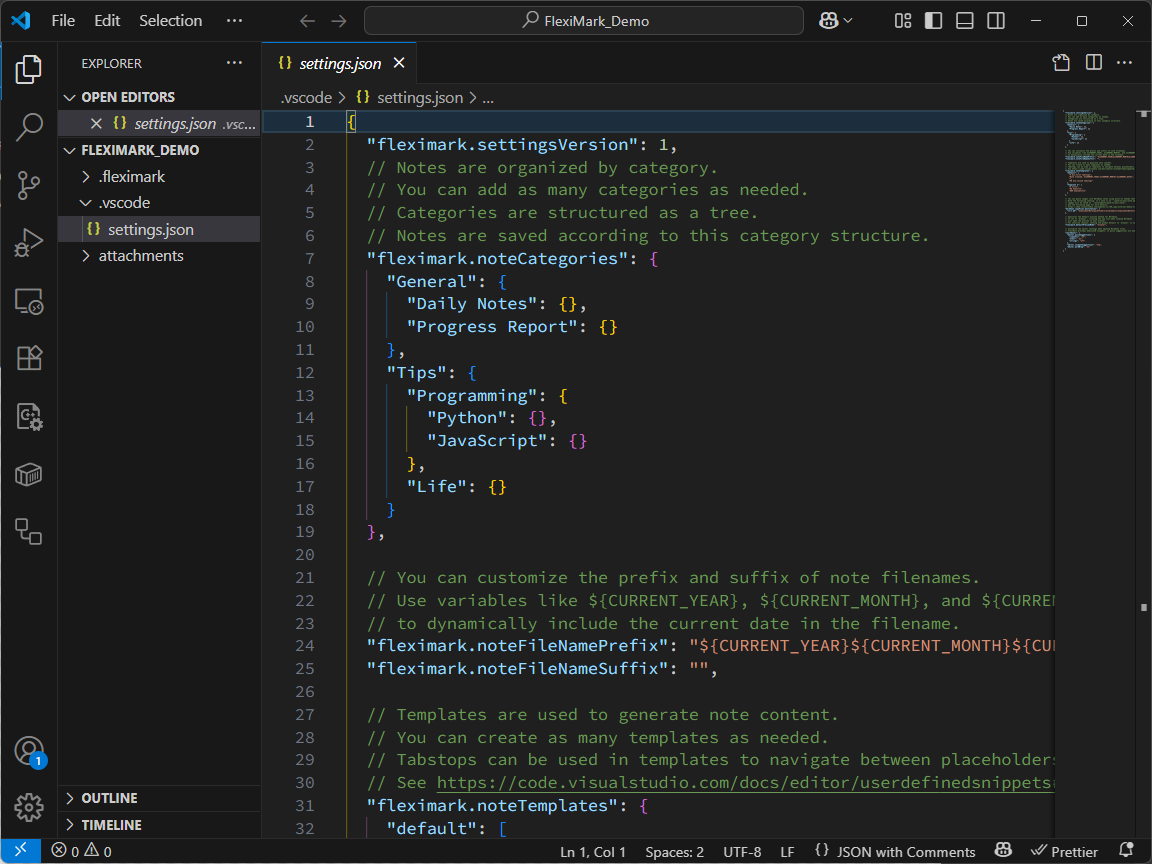
Let’s start by customizing the note categories. Modify the following part of .vscode/settings.json as you like. Double-byte characters like Japanese are supported.
{
  "fleximark.settingsVersion": 1,
  // Notes are organized by category.
  // You can add as many categories as needed.
  // Categories are structured as a tree.
  // Notes are saved according to this category structure.
  "fleximark.noteCategories": {
    "General": {
      "Daily Notes": {},
      "Progress Report": {}
    },
    "Tips": {
      "Programming": {
        "Python": {},
        "JavaScript": {}
      },
      "Life": {}
    }
  },
  ...
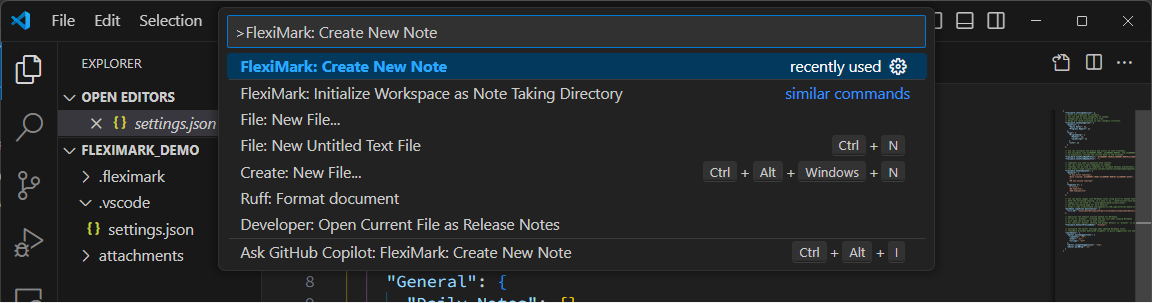
Now let’s create your very first note! Press F1 and enter the following command. Then press Enter.
FlexiMark: Create New Note
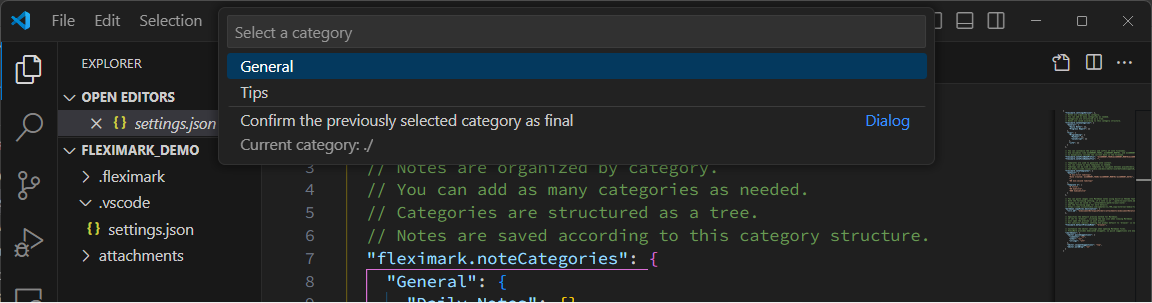
A dialog will appear prompting you to select a category based on the structure you just defined.
Use the arrow keys to choose a category and press Enter to move to the subcategory.
The selection continues until you reach the final subcategory.
If you want to stop at an intermediate level, select the bottom-most option in the dialog.
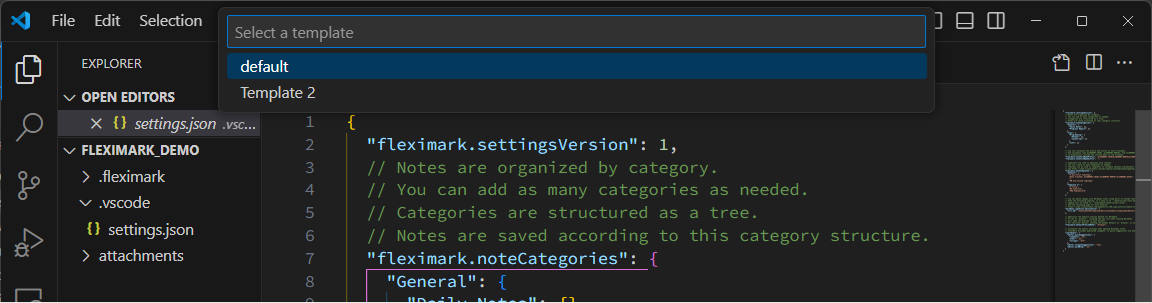
Next, you’ll be asked to choose a Markdown note template.
By default, two sample templates are available. These can be changed in .vscode/settings.json.
For now, select default and press Enter.
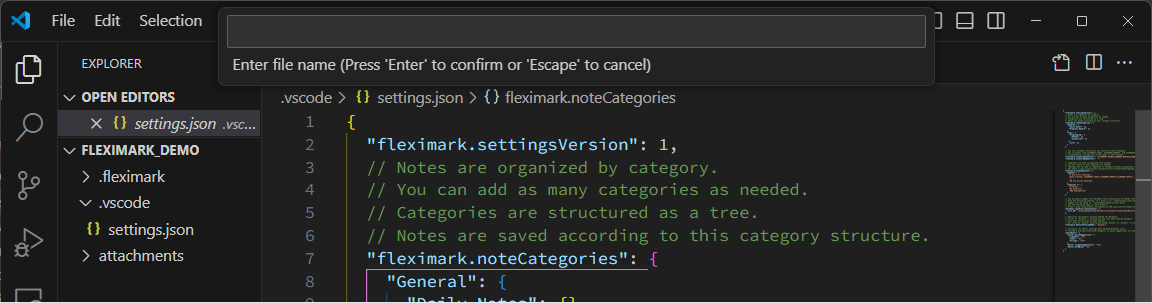
Finally, enter a filename for your Markdown note.
The final file name will follow this format: {{prefix}}{{YOUR FILE NAME}}{{suffix}}.md,
where the prefix and suffix are defined in .vscode/settings.json.
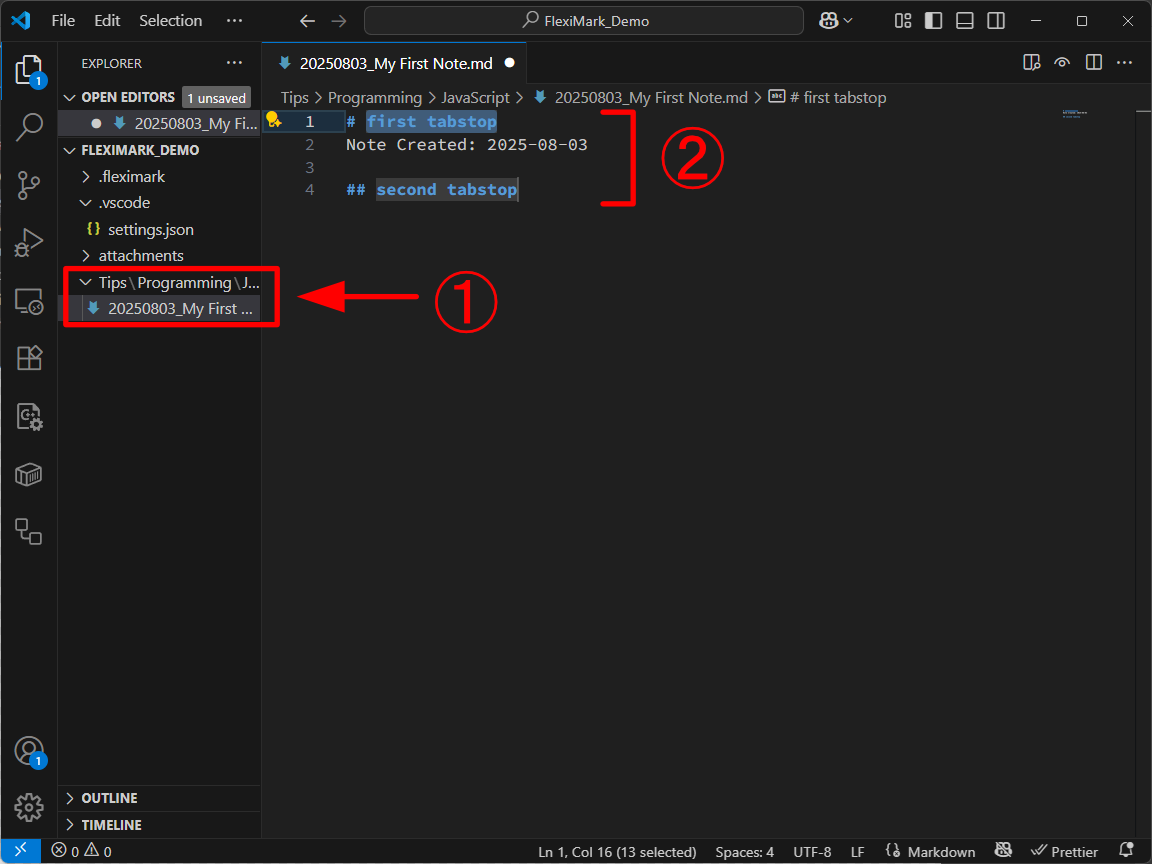
Your note has been created!
- Confirm that the note has been created in the selected category hierarchy.
- Enter any text in the
first tabstop, then press theTabkey to move the cursor to thesecond tabstep.
Next Steps
That’s it for the initial FlexiMark setup!
Next, head over to Basic Usage to learn the basics of how to use it.